 www.webx.dk Start page
 OZ2CPU Radioamateur mainpage
 Homemade electronics Stuff old and new
 Homemade LED white light bulb cheap and easy going green
www.webx.dk Start page
OZ2CPU Radioamateur mainpage
Homemade electronics Stuff old and new
Homemade LED white light bulb cheap and easy going green
Going green is fun and there is no need for it to be extreamly expensive ! you can DIY an LED white light bulb at a fraction of the cost
compared to the ready made you see in the shops, actually at that cost they will payoff when seen over a decade or two..
this project will payoff allready next week.
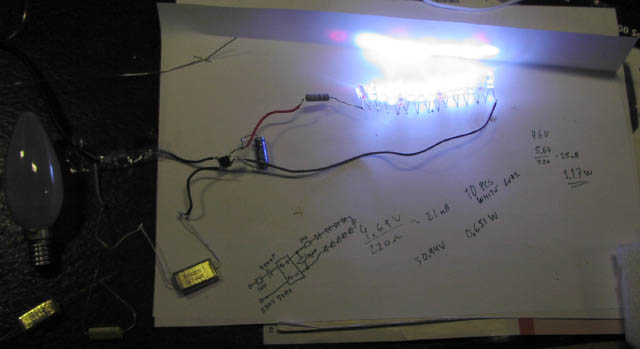
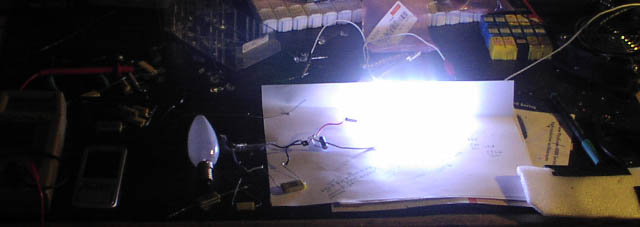
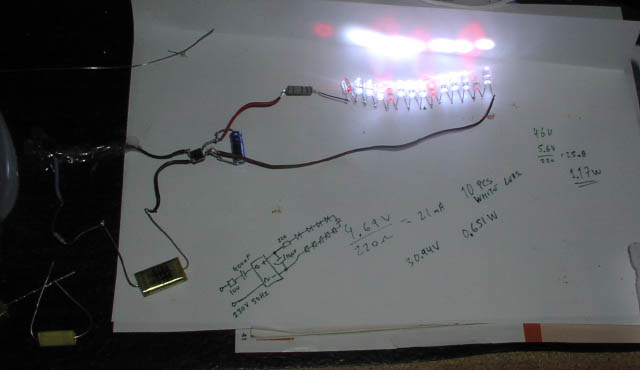
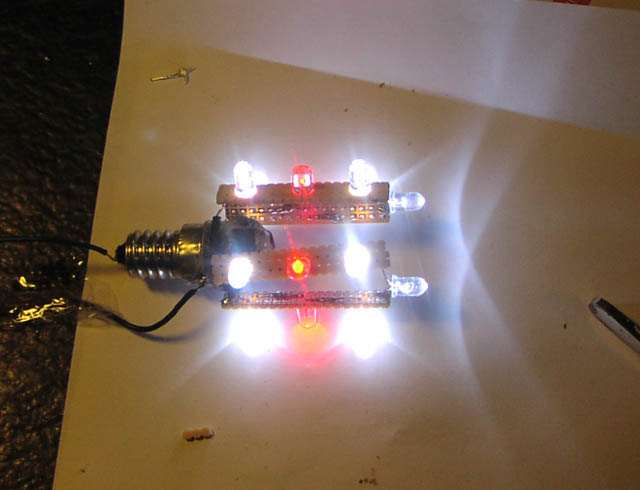
First task is to test the LEDs and the mains supply direct drive is working
I cheated and used a vario-transformator so I could turn up the "mains" voltage slowly, while checking and measure all is fine.
this project will incase something is connected wrong potentially generate smoke and exploding parts
maybe even fire and draw attention to your bad solder skils, so if this is your first DIY.. dont do it.. ask a friend with abit of skils.
it is important to measure the DC voltage drop over the 220 ohm resistor and calculate the diode current
I wanted to go for at least 5V drop but under 6V drop, so I know the LEDS are driven a bit under their specified current
other diode types may be designed for more or less current, always check datasheet !!
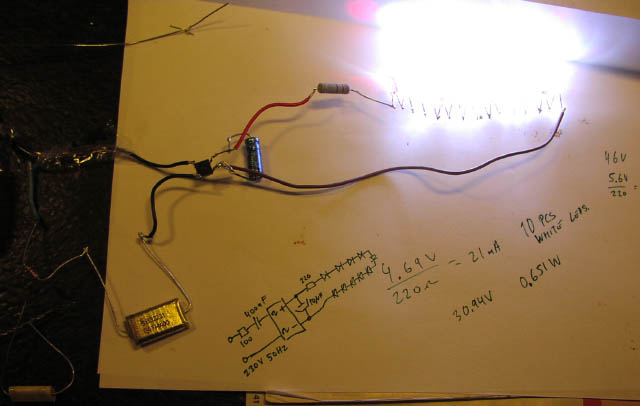
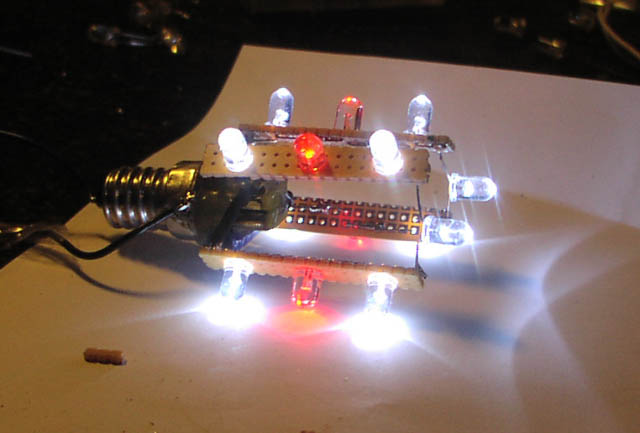
Plenty of light output at only 20-25mA, I tried first with 10 white leds only
but the cheap types I found are a bit blueish, so I added 4 red leds in the chain to "warm" it a bit
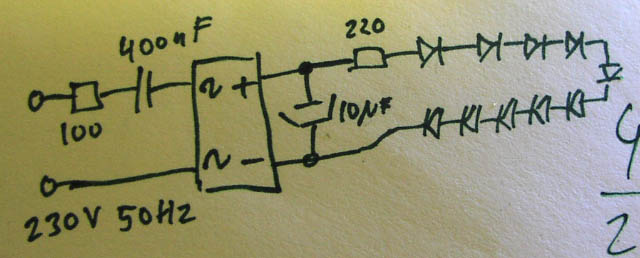
The schematic is quite simple, and is a LOSS FREE powersupply, only disadvantage is it's NOT isolated from the mains !!
so take care when measuring voltage drop over the 220 ohm, do not touch anything while powered.
the 100 ohm resistor protects for peak current at powerup - then you can use a tiny rectifier bridge
the 400nF capacitor sets the energy level to be transfered, I needed to go up to 440nF when I added more leds, and also wanted a bit more curent
be sure you use a voltage rating that is about double the AC voltage you have !! for 230 V AC input I use a 400 V type
the 10uF capacitor is needed to make a perfect non blinking light source,
its voltage rating must be double as what you measure on the capacitor while it is loaded, (NEWER power up this circuit with out LEDs connected)
you may remember those cheap x-mas lights that blinks terrible ignoring ! remove the 10uF cap to get that effect :-)
the 220 ohm is for protection of diode current and linearisation, also it is a good point to measure voltage drop and calculate diode current
In my case I have 5.6V over the 220 ohm = 25mA, and the supply voltage over the 10uF is 46V, so my power usage from mains is 1.17 Watt
my AC power energy meter showed 1.1W so this proves it is an accurate methode and loss less supply, due to its capacitive voltage divider.
To the left, an old defective light bulb, soon going to be smashed
picture taken with flash show better the red led mix to warm it up a bit
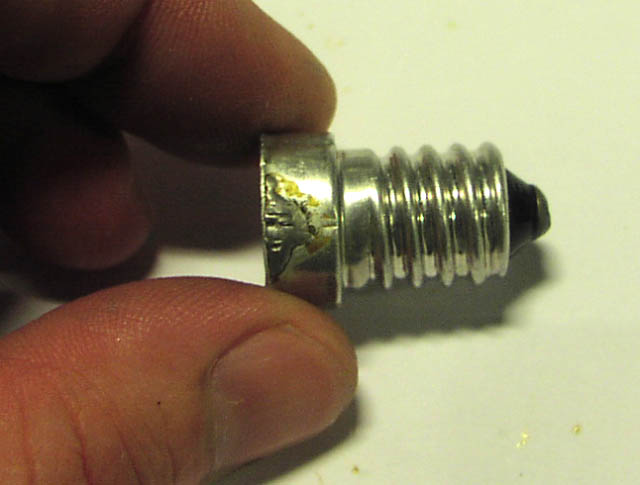
lightbulb was removed outdoor ! and socket cleaned as much as possible
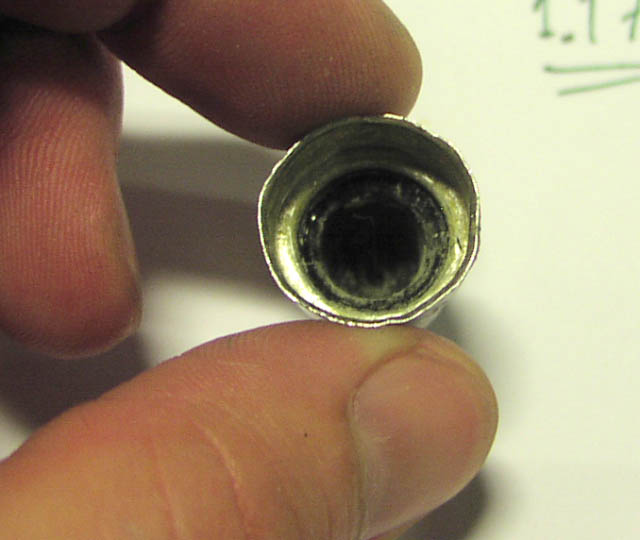
this hole can almost fit some of the components
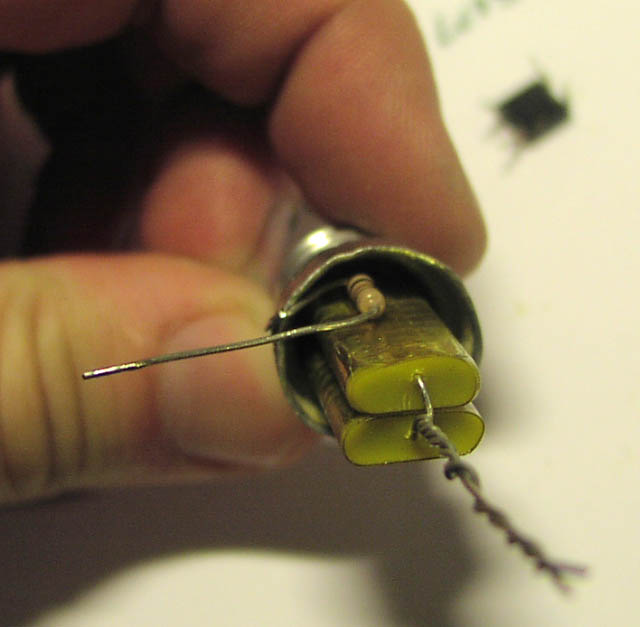
the 100 ohm and 2 x 220nF 400 V types
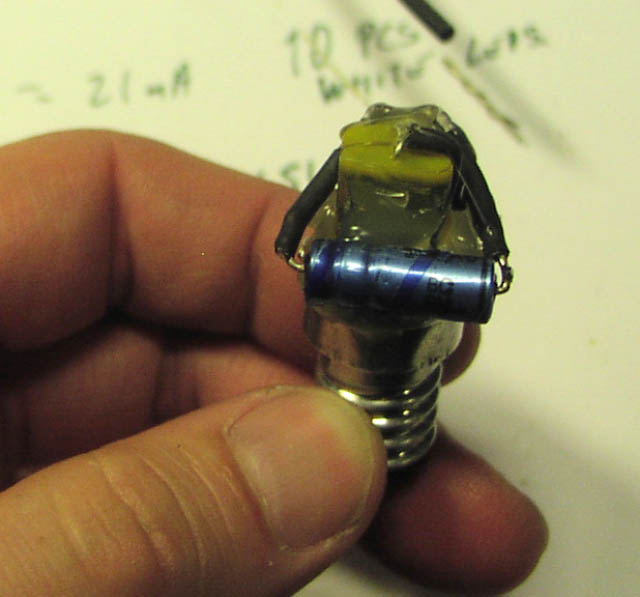
the 10uF is a 100V type, so plenty of margin here
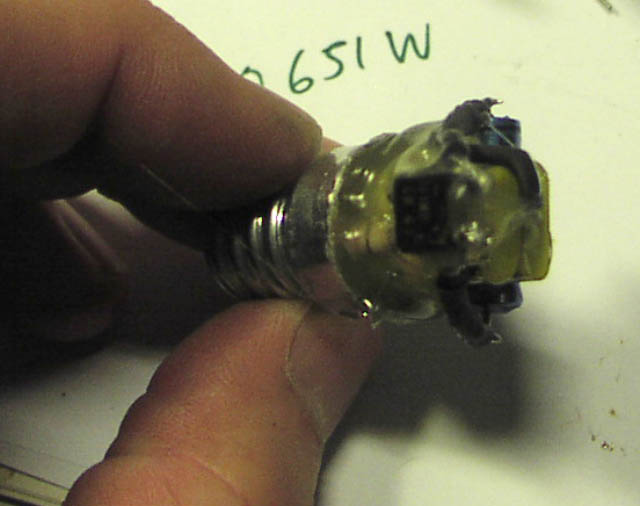
tiny 4 pin rectifier almost visible in the heatmelt glue, yes this thing dont get hot at all !! so heat melt glue can be used.

heatshrink double layer to insulate and add distance is a good idea
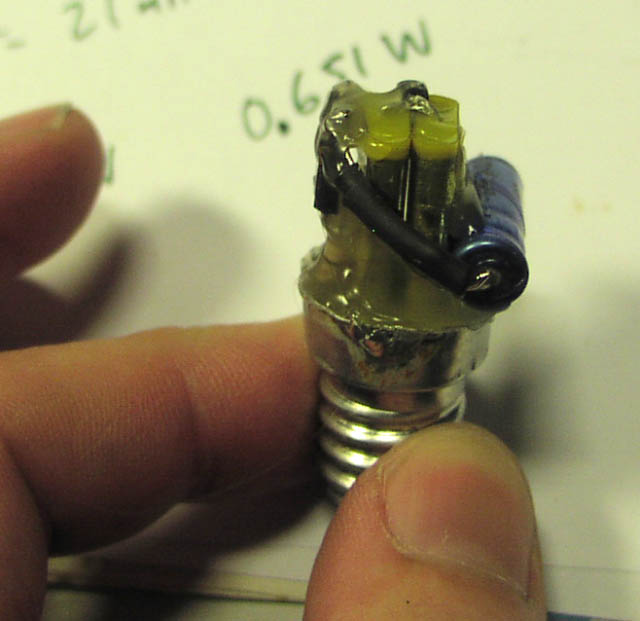
Try to make it as compact as possible, for better fit in your lamp later

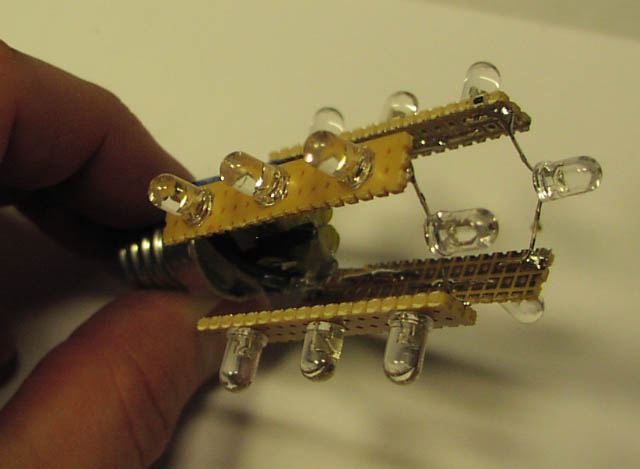
prototype board can be cut out and used as a stable holder for the leds
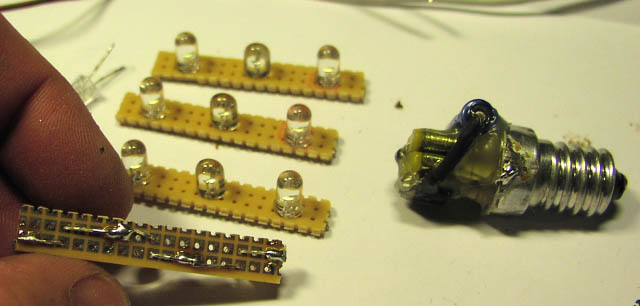
each little board was carefully serial connected and tested again to be sure it is right
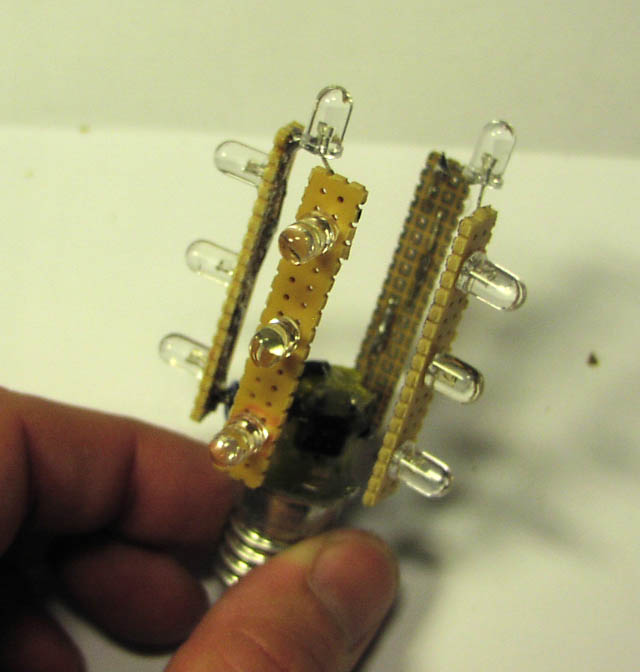
I tried to spread the light in all directions, leds are quite directional specially before I grinded them flat
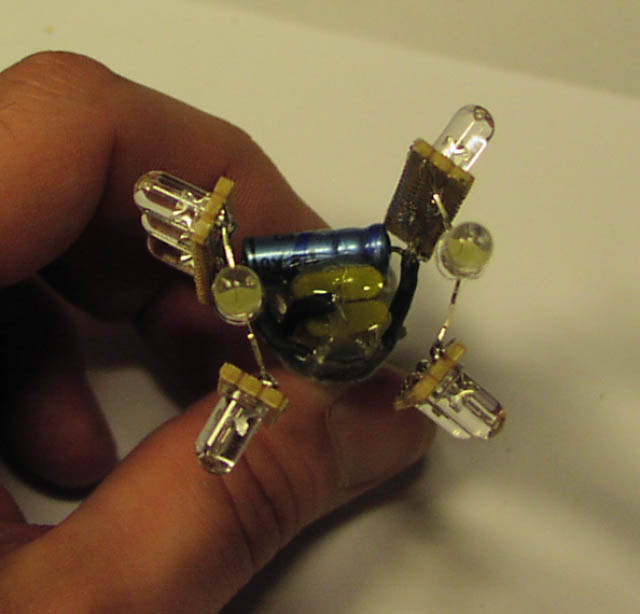
using the capacitor ends as a supply base and the top leds as connections from the 2 and 2 boards, I got all the way arround without adding wires
making it straight and nice was not my main task, this is only a prototype to prove the NO LOSS supply is good
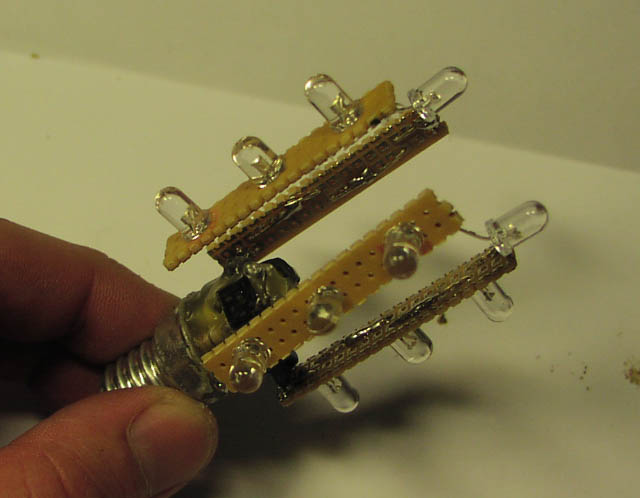

The 220 ohm resistor can go anywhere in the diode chain, so I added it here and heatshrink'ed it with 2 layers
it is clear the red leds are not same hipower technology, just bad luck

the beam width of the leds is terrible narrow, so to solve this, I simply grinded them flat ! this gives a much more nice diffused light
use sand paper or a table grinder, be carefull not to grind too deep into the led, just make it flat top and stop there.
sorry I dont have any closeups of the grinded flat top, I did that just before installing it in the bathroom

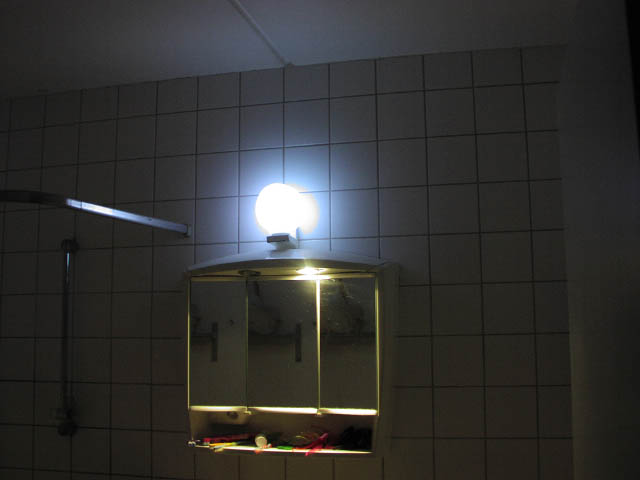
there used to be two halogen spots 20W each ! but when one died we newer missed the light (actually too much light power from those spots)

the camera can not really be used as a power compare of the two lamps,
the led light is only 1.2W and the halogen spot is 20W, it is offcourse a lot more powerfull

The lamp glass outher light spreader was mounted and a much more nice light is seen
also the LED light is a bit more blue compared to the halogene that is a lot warm in color
I feel confident to say anyone can make LED light at home and save big time !
LEDS can be ripped from cheap x-mas light chains, and the electronics needed to make this NO LOSS supply is extreamly cheap
you can use as many LEDs as you want to get the light power level needed for your application, offcourse you need to adjust the input
capacitor value to get the correct voltage and current into your leds. This was my first try, but maybe not the last.
Made by Thomas Scherrer OZ2CPU Summer 2009.